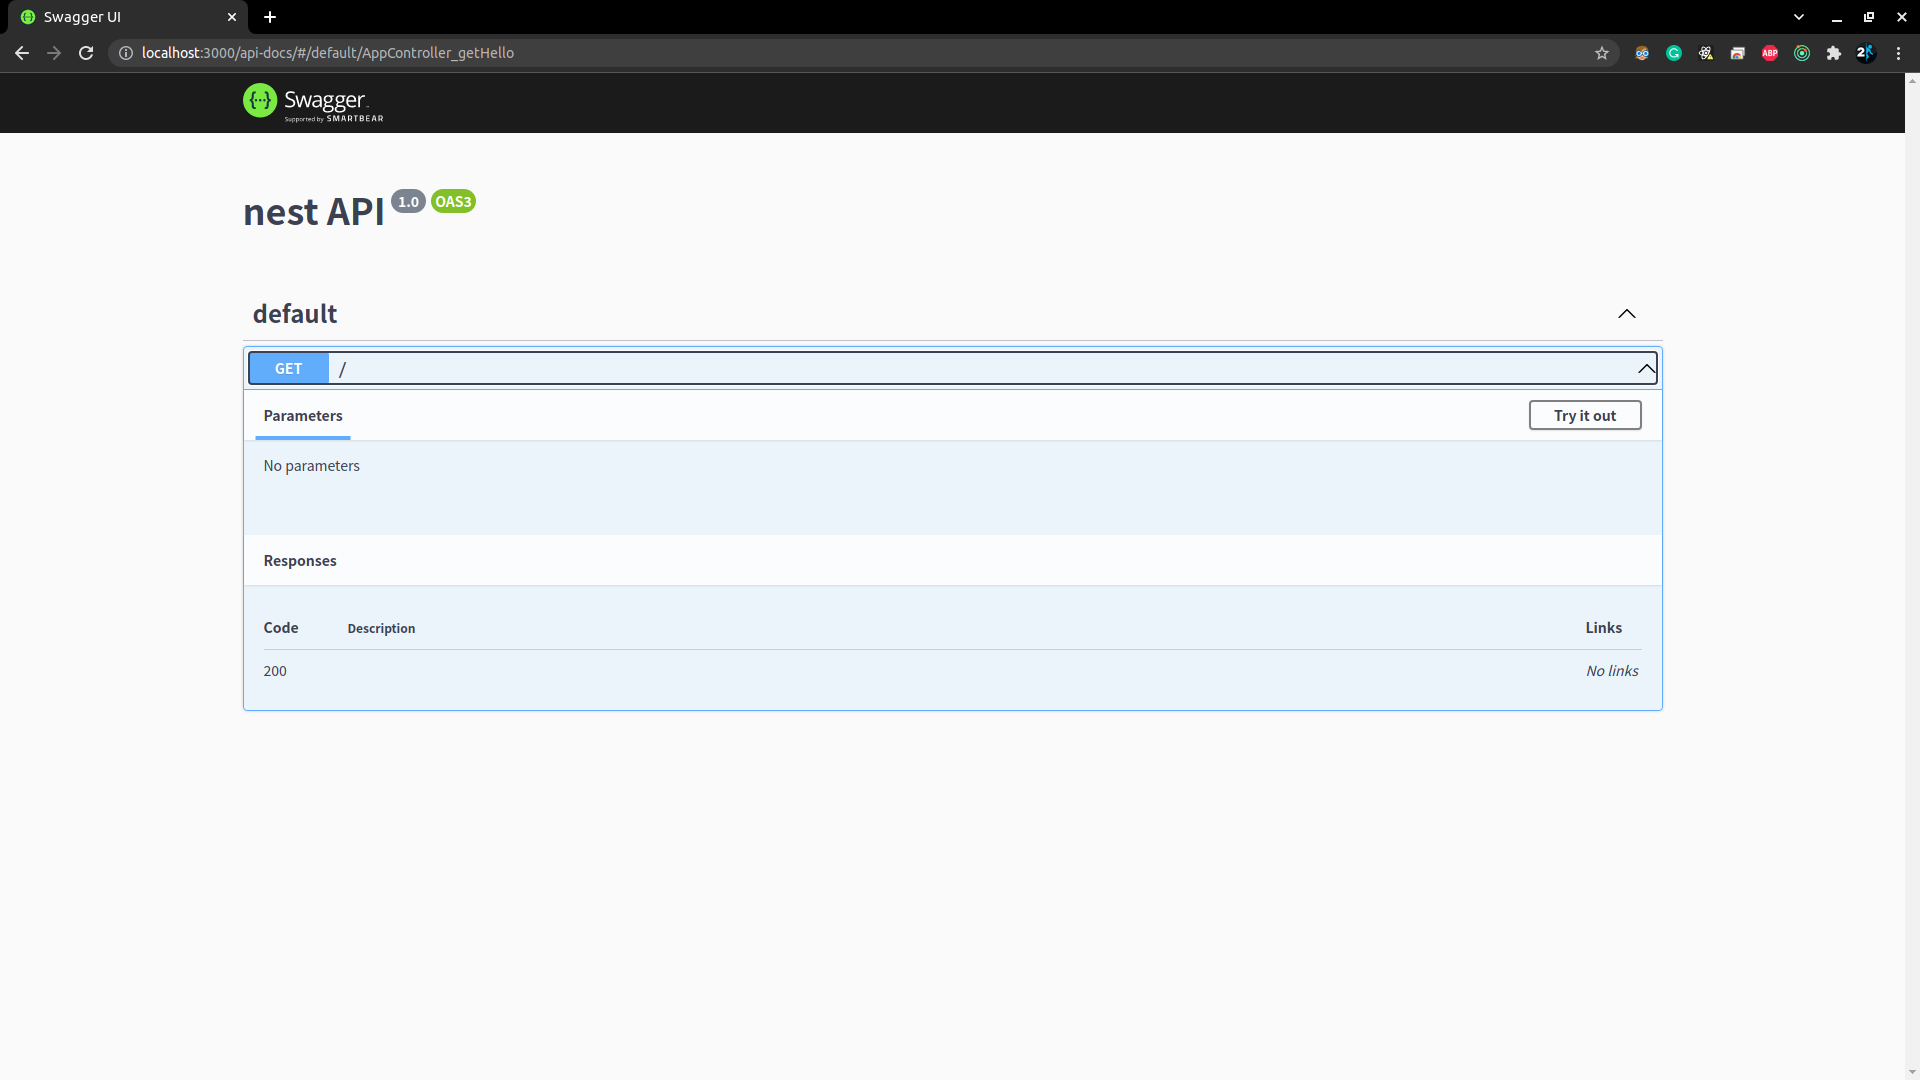
이제 위 코드에서 document변수를 이용하여 문서를 생성합니다. 'SwaggerModule.createDocument'의 첫번째 인자는 해당 서버 앱, 두번째는 셋팅한 Swagger option 변수 입니다. 그리고 마지막으로 SwaggerModule.setup을 하면 서버 실행과 동시에 web Document가 생성이 됩니다. 이때에서 첫번째 인자는 root url다음에 올 카워드로 이는 서버에서 API문서를 제공하기 위한 Swagger API입니다. 위 코드에서는 'api-docs'이기 때문에 실제 경로는 'root url/api-docs' 입니다.
이제 해당 url(위 예시에서는 'localhost:3000/api-docs')에 접속하면 default API문서가 생성됩니다. 다음에는 실제 API를 만들면서 Swagger를 적용하여 자동 Document를 작성하도록 하겠습니다.
안녕하세요. 오늘은 프로퍼티 노드에 대해서 설명을 드리겠습니다. 프로퍼티 노드를 사용하는 방법은 2가지가 있는데 참조를 이용하는 방법과 직접 프로퍼티 노드를 생성해서 사용하는 방법이 있습니다. 오늘은 프로퍼티노드만을 이용해서 카운트를 올리는 프로그램을 만들도록 하겠습니다. 그림1) 버튼생성후 기계적동작 변경 새로운 VI를 생성후 그림 1과 같은 버튼을 설정 합니다. 스위치의 기계적 상태는 '놓을때 위치'로 설정을 합니다. 이후 'Start', 'Hold', 'Reset', 'Stop' 버튼을 만들어 같은 기계적 상태로 놓습니다. 그림2) 숫자형 컨트롤 생성 그림3) 숫자형 컨트롤 글짜크기 변경 그림4) 숫자형 컨트롤의 형을 변경 그림2~4까지 숫자형 컨트롤을 만들고 프런트 패널에 배치합니다. 그림5) 프런트패널 완성 그림6) 숫자형 컨트롤을 인디게이터로 변경 숫자형 인디게이터는 Count에만 사용하기 때문에 블록 다이어그램에서 인디게이터로 변환합니다. 그림7) 플랫 시퀸스, While, 이벤트 케이스 생성후 프로퍼티 생성그림7과 같이 플랫 시퀸스안에 케이스를 2개를 만듭니다. 2번째 케이스에 While루프와 그안에 이벤트 케이스를 만들어 줍니다. 첫번째 케이스에 각 버튼을 초기화 해야 하기 때문에 그림7에서 블록다이어그램에 있는 버튼을 우클릭후 프로퍼티 노드에 들어가서 값을 선택합니다. 그림8) 프로퍼티에 값과비활성화 포함 프로퍼티노드는 원하는 많큼 층을 만들수가 있습니다. 마우스로 프로퍼티노드를 아래로 끌면 다른 속성의 프로퍼티노드가 생성됩니다. 그리고 초기화하는 케이스에 비활성화를 선택해 줍니다. 그림9) 초기화 케이스구조 그림9는 프로그램이 처음 시작될때 버튼들을 초기화 해줍니다. 처음 시작되면 'Start', 'Stop' 버튼을 제외하고 모두 비활...
안녕하세요 알렉스 입니다. 오늘은 저번 글과 마찬가지로 프로퍼티 노드에 대해서 설명해 드리겠습니다. 저번에는 프로퍼티 노드 자체를 생성해서 사용했는데 이번에는 참조를 이용해서 만들어보도록 하겠습니다. 제가 참조를 이용해서 프로퍼티 노드를 사용하는 이유는 SubVI때분 입니다. 사실 글로벌 변수로 각 VI들이 데이터를 주고 받을수 있지만 참조를 통해서도 데이터를 교활할수 있습니다. 그럼 먼저 프로젝트를 생성하도록 하겠습니다. 그림1) 프로젝트 생성 그림2) 프로젝트에 Main.vi 생성 먼저 프로젝트를 생성한 후에 Main.vi를 생성해 줍니다. Main.vi는 프로젝트에서 우선적으로 동작될 프로그램 입니다. 그림3) 프런트 패널 디자인 그림4) Stop버튼을 놓을때 스위치로 변경 프런트 패널을 보시면 LED와 Stop버튼만 있습니다. 그림3과 같이 배치 해 주시고 그림4에서 Stop의 기계적 동작을 '놓을때 스위치'로 변경 하면 됩니다. 그림5) Stop버튼에 참조 생성 이제 불리언과 Stop버튼의 참조를 생성해 줍니다. 컨트롤 패널 또는 블록다이어 그램에서 마우스로 해당 컨트롤 또는 변수를 우클릭 한 후에 생성에 들어가면 참조를 생성할수 있습니다. 그림6) 프로퍼티노드 위치 저번 글과 달리 이번에는 참조를 이용한 프로퍼티 노드를 생성하는 방법 입니다. 블록다이어 그램에서 그림6에 위치함 프로퍼티 노드는 생성하시면 됩니다. 프로퍼티 노드 왼쪽에 참조값이 들어가면 기존의 프로퍼티 노드처럼 사용이 가능합니다. 그림7) 프로퍼티노드 속성 선택 프로퍼티 노드를 참조와 연결한 수에 좌클릭을 하시면 여러 속성이 나오는데 지금은 값을 선택하도록 하겠습니다. 그림8) 프로퍼티 노드를 쓰기로 변경 처음 플랫 케이스는 초기화이기 때문에 Stop의 프로퍼티노드를 False로 해야 합니다. 따라서 쓰기로 변경해 줍니다. 그림9) 프로퍼티 노드를 쓰기상태 ...
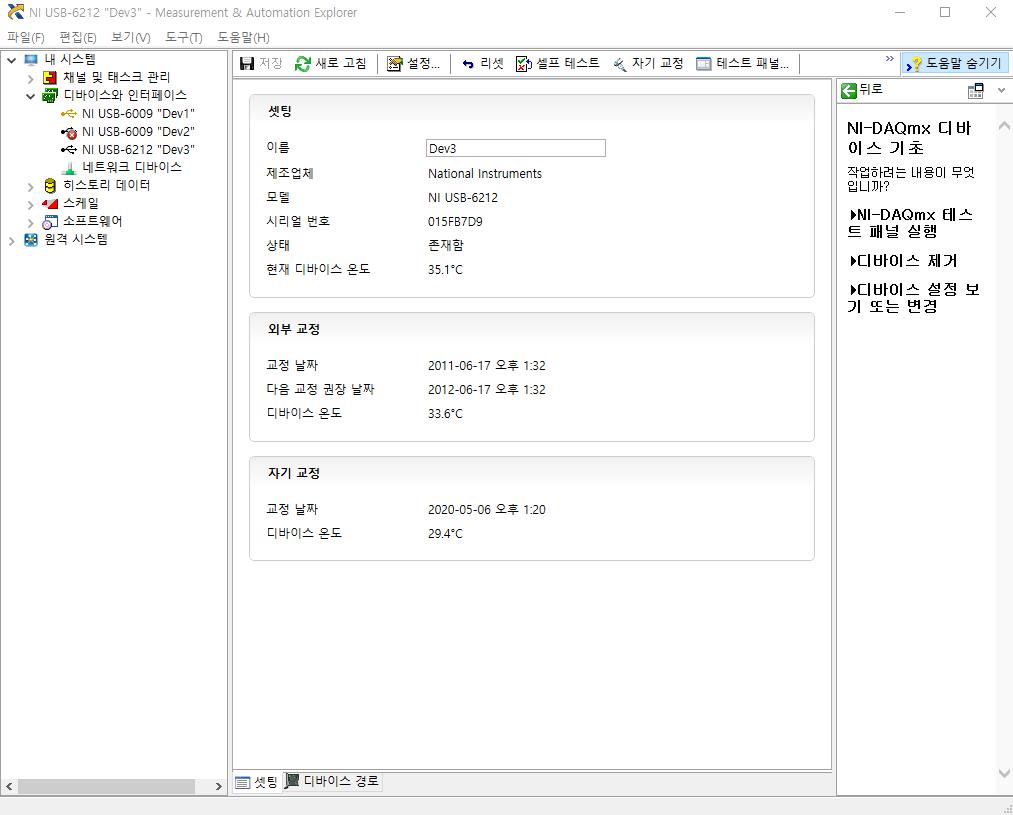
안녕하세요. 알렉스 입니다. 이번에는 LabVIEW를 이용해서 PC로 전압값을 측정하도록 하겠습니다. 이전글에 USB-6121을 이용해서 측정한다고 하였습니다. 자세한 스펙은 나중에 설명하고 이번에는 전압값을 측정해서 PC에 나타내도록 하겠습니다. 사진1) MAX로 연결상태 확인 일단 USB-6121을 PC와 연결하고 MAX에서 연결상태를 확인합니다. 사진1에서는 USB-6121은 "Dev3"으로 지정이 되어 있습니다. 사진2) 코딩시 필요한 함수 이제 MAX에서 제대로 연결된 것을 확인하면 이제 블록다이어그램에서 필요한 함수들을 나열합니다. 사진3) AI 채널생성 사진4) AI 채널지정 사진5) AI셋팅 사진3,4에서 AI채널 설정을 하여줍니다. 사진5를 보면 AI의 최대,최소 전압을 각각 +10, -10V로 하여주시기 바랍니다. 그리고 입력터미널 설정을 RSE로 설정합니다. (셋팅에 대한 설명은 다음글에) 사진6) 샘플타이밍 설정 사진7) 측정주파수(Hz)설정 이제 DAQ가 어떻게 샘플을 수집할 것인지와(사진6) 1초에 몇회 데이터를 측정할 것인지(사진8)를 결정해 주셔야 합니다. 측정 주파수는 Hz단위를 사용하며 예제에서는 1000을 넣었기 때문에 1초개 1000번 데이터를 수집합니다. 사진7) 전압을 읽을 인디게이터 생성 이제 전압을 읽을 인디게이터를 생성합니다. 현재 아날로그는 1채널의 1샘플을 측정하게 되어있기 때문에 1초에 1000번씩 인디게이터에 전압값을 출력합니다. 이상태에서 Run을 하게 되면 전압은 1번만 측정하고 프로그램이 종료됩니다. 사진8) While루프 생성후 나머지 연결 계속 측정하기 위해서는 While루프를 생성해서 지속적으로 전압값을 측정해야 합니다. 사진8과 같이 코딩을 하신후 마무리 하면 됩니다. 사진9) USB-6121연결 회로도 사진10) 실...


댓글
댓글 쓰기